Some notes on the Boxster Crankcase Vent Vale. First, it is not a PCV. The vent is actually an elbow that connects to the Air Oil Separator and on some versions, it has a small vent that vents crank case over pressure to the atmosphere.
This is the Crankcase Vent I installed, purchased at Amazon for $27 (October 2016): http://amzn.to/2dCa14Q
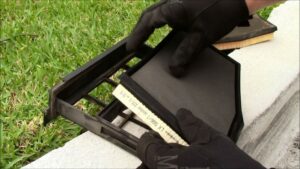
CRANKCASE VENT REPLACEMENT STEPS:
- Gain access to front and top of engine.
- Unclip the electrical connector in front of the vent valve (you do not need to disconnect the connector)
- Remove the 10mm screw that holds down the bracket that is in front of the valve.
- Move the bracket out of the way.
- From the top going down, use 10mm socket with universal joints and extensions to unscrew the valve hold down screw.
- Remove the screw with a magnet or claw.
- Push the valve down and back to move it towards the bottom of engine.
- Jack up the cart and place on jack stand.
- From underneath the car, remove the valve from the tube. This is a squeeze then pull typ connector, just like on the Air Oil Separator.
- Snap the new valve onto the tube and push back up.
- Insert the new valve into its hole.
- Looking down from top, ensure the hold down hole is aligned with the screw hole in the engine.
- Place the scew into the hole with needle nose or claw grabber thingy
- Using the 1/4 drive sockets and universal joint, gently tighten the screw.
- Re-attach the bracket that sits in front of the vale, be sure to re-attach the ground wire.
- Install all the engine access covers.
TOOL LIST:
- 10mm sockets in 1/4 and 3/8 drive
- Ratchet extensions and universal joints
- Jack and jack stand
- Flat head screwdriver
- Extendable magnet
- Needle nose pliers with bent end or claw grabber thingy
- Flashlight