The Land Rover 4.4L V8 Engine uses an oil cooler. The oil cooler is located on the bottom of the engine and it uses an adapter to connect it to the engine. There is a gasket between the oil cooler adapter and the engine. When this gasket fails it will leak oil at the attachment surfaces and leak oil through the lower mounting screw hole at the front of the adapter / oil cooler.
The leaking oil will cover the underside of the engine, the steering rack, suspension components and skid plates.
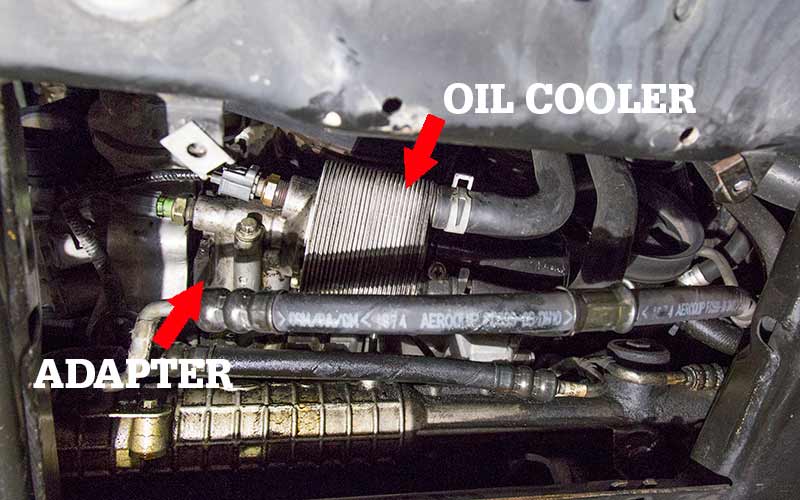
PLEASE NOTE: There are several items around this part that can cause an oil leak, the crankshaft pulley seal, the front engine cover seal and more. It is wise to do diagnostic work such as cleaning the engine and inspecting thoroughly to locate the true location of any leaks.
To replace the gasket you DO NOT need to drain all of the engine oil, the procedure only requires the removal of the oil filter and the cooler for a loss of under 1 quart of oil. You DO NOT need to remove any coolant lines that are attached to the oil cooler.
COOLANT LEAK NOTE: If you notice coolant on or around the oil cooler, chances are the oil cooler is not leaking. The coolant is usually coming from a leak at the water pump or somewhere else above the oil cooler.
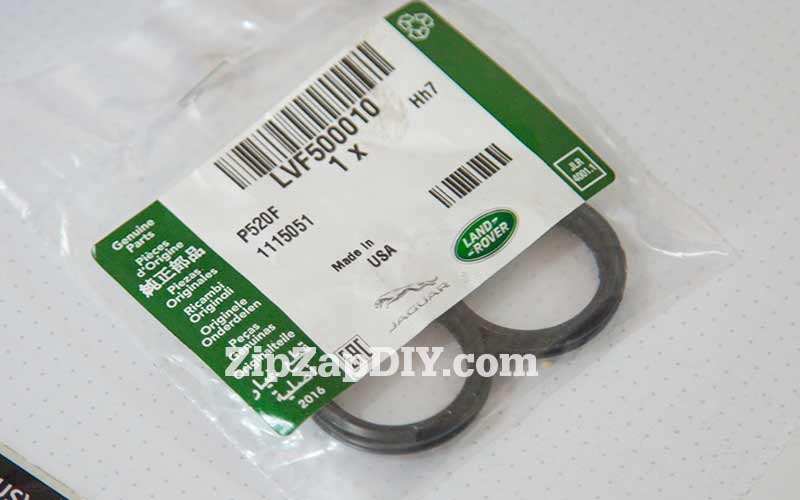
The oil cooler adapter gasket looks like two o-rings joined together.
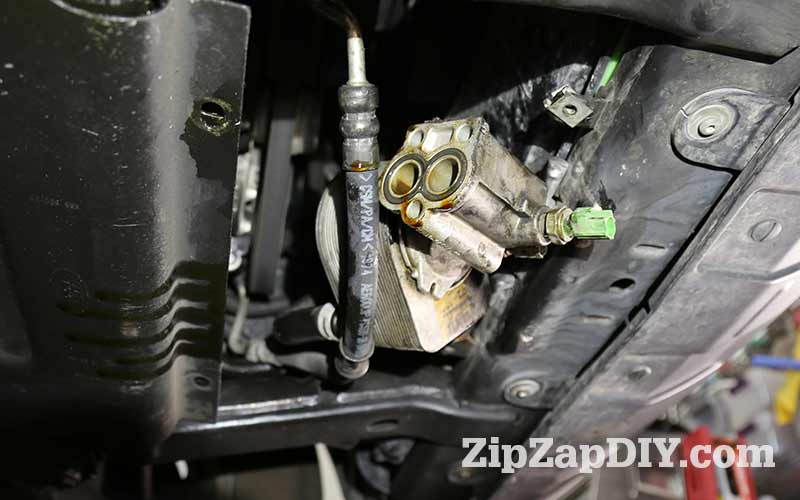
Steps to replace the LR3 oil cooler adapter gasket.
- Safely place the LR3 on ramps or jack stands.
- Remove the radiator access panel. (This is the smaller skid plate underneath the radiator.)
- Place a pan underneath the oil filter and remove the oil filter. A small amount of oil will drain.
- Disconnect the two electrical connectors from the oil cooler assembly.
- Remove the three 10mm screws that hold the oil cooler to the engine. A small amount of oil will drain.
- Remove the old gasket.
- Clean the now exposed surfaces and surrounding area.
- Install the new gasket. Available on Amazon for $8.50 (Feb 2018) http://amzn.to/2skQcbj
- Install the oil cooler assembly and tighten the three screws to a suggested 7ft lbs or 10nm of torque. (The workshop manual does not specify a torque for these screws, this torque is based on other torque specs for similar screws on the engine.)
- Clean the underside of the LR3 and install the radiator access panel.
